Sunday, March 10, 2013

Crochet scarf with flowers

this pattern is not my own, but I really like the way it looks. I would use different colors, but it still looks really good. this is from: http://luisafelice.blogspot.com/2010/12/crochet-scarf-with-flowers.html


Crochet scarf with flowers

I really cant write patterns..and my crochet is not that great but here is a pattern for a scarf i made. I crocheted a scarf in a simple stitch, i believe it was a treble all the way, you can make this as long as you like. I made 5 flowers but again its up to you.
If you dont want to make the scarf you can buy it HERE


Crochet flowers (got this off my aunt, but as Ii said, i crochet my own way but i think this is as close as it gets!)

Abbreviations:

ch = chain; dc = double crochet; lp = loop; rep = repeat; sc = single crochet; ss = slip stitch;tr = treble crochet.

Round 1:Ch5,, join into a circle, work 15sc into circle. Ss into first ch.
Round 2: Ch4, * skip 1sc, 1dc into next sc, ch1, rep from * 6 times more. Join with a ss into the 3rd of the first 4ch. 
Round 3: Work 1dc, 1tr, 1dc, 1sc, * into next ch loop, work 1sc, 1dc, 1tr, 1dc, 1sc, rep from * into each ch loop, making 8 petals. Join with a ss into first ch.
Round 4 Working behind the petals made in the 3rd round, make ss between 2 petals, ch 4, * 1sc between next 2 petals, ch3, rep from * to end. The ch loops made lie behind the petals of the previous row. Join with a ss into first ch.
Round 5 Make the next row of petals by working 1sc, 1dc, 2tr, 1dc, 1sc into each ch loop. Join with a ss into first sc.
I hope this makes sense!

Tuesday, March 5, 2013

sailor hat pattern

So for this simple sailor hat, I used some 100% cotton thinner yarn, but if you want it softer go ahead, but you might have to make it a little smaller. Softer yarn= thicker and more stretchy. I like the look of this better that is why I chose it. So you will start off with blue yarn, then red, then red, and lastly for the anchor, black.

Main hat:
blue:
                -use magic loop to ch 8, sl st to join.
                -ch 1; 2 hdc in each ch around; (16 hdc) sl st to join
                -ch 1; (2  hdc in next hdc, 1 hdc in next hdc) around (24 hdc) sl st to join
               -ch 1; (2 hdc in next st, 1 hdc in next 2 st) around (32 st) sl st to join
               -ch 1 (2 hdc in next st, 1 hdc in next 3 st) around (40 st) sl st to join
               -ch 1 (2 hdc in next st, 1 hdc in next 4 st) around (48 st) sl st to join
               -ch 1 (2 hdc in next st, 1 hdc in next 5 st) around (56 st) sl st to join
               -ch 1 (2 hdc in next st, 1 hdc in next 6 st) around (64 st) sl st to join
               -ch 1 (2 hdc in next st, 1 hdc in next 7 st) around (72 st)sl st to join
               -ch 1 (2hdc i next st, 1 hdc in next 8 st) around (80 st) sl st to join
              -ch 1; (1hdc in each st around) repeat until about 8 rows or desired length
               - end off; change colors to red
red:
             -sl st to join; ch 1, (hdc 2tog) around (40 st)
             -ch1; (hdc 2tog, hdc 1) around (32 st); end off
white:
            -sl st to join; ch 1 (hdc 2tog, hdc in next 2 sts) around (24 st)
            -ch1; hdc in every st around; repeat 2 times; end off
black:
            -make 3 separate chains; one of 4, one of 6, and one of 8
            -with a thick needle, sew it onto the hat in the shape of an anchor


learning how to crochet

For all you beginners out there, I hope this helps. Here are some step by step instructions to start to crochet .

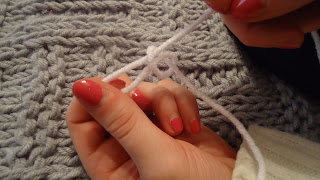
 The next three photos are showing the beginning of your 'chain' or first row that you will add on to.  You do this by wrapping the yarn around your pointer finger and thumb.


After the yarn is wrapped around, grab the longer          end of the yarn.


Continue pulling through the loop until you have made a slip knot.


<- finished slip knot


now put the top of your crochet hook in the slip knot to begin your chain


now pull the longer string through the loop that is on your hook.


Continue doing this until you have a chain of desired length
 Now you have completed your first chain! whew! now it is time to build onto that so you have something useful (besides a really long necklace)

                                                                                   And this is what a completed chain looks like!